# image-template
This repository is meant to be a template for building your own custom [bootc](https://github.com/bootc-dev/bootc) image. This template is the recommended way to make customizations to any image published by the Universal Blue Project.
# Community
If you have questions about this template after following the instructions, try the following spaces:
- [Universal Blue Forums](https://universal-blue.discourse.group/)
- [Universal Blue Discord](https://discord.gg/WEu6BdFEtp)
- [bootc discussion forums](https://github.com/bootc-dev/bootc/discussions) - This is not an Universal Blue managed space, but is an excellent resource if you run into issues with building bootc images.
# How to Use
To get started on your first bootc image, simply read and follow the steps in the next few headings.
If you prefer instructions in video form, TesterTech created an excellent tutorial, embedded below.
[](https://www.youtube.com/watch?v=IxBl11Zmq5wE)
## Step 0: Prerequisites
These steps assume you have the following:
- A Github Account
- A machine running a bootc image (e.g. Bazzite, Bluefin, Aurora, or Fedora Atomic)
- Experience installing and using CLI programs
## Step 1: Preparing the Template
### Step 1a: Copying the Template
Select `Use this Template` on this page. You can set the name and description of your repository to whatever you would like, but all other settings should be left untouched.
Once you have finished copying the template, you need to enable the Github Actions workflows for your new repository.
To enable the workflows, go to the `Actions` tab of the new repository and click the button to enable workflows.
### Step 1b: Cloning the New Repository
Here I will defer to the much superior GitHub documentation on the matter. You can use whichever method is easiest.
[GitHub Documentation](https://docs.github.com/en/repositories/creating-and-managing-repositories/cloning-a-repository)
Once you have the repository on your local drive, proceed to the next step.
## Step 2: Initial Setup
### Step 2a: Creating a Cosign Key
Container signing is important for end-user security and is enabled on all Universal Blue images. By default the image builds *will fail* if you don't.
First, install the [cosign CLI tool](https://edu.chainguard.dev/open-source/sigstore/cosign/how-to-install-cosign/#installing-cosign-with-the-cosign-binary)
With the cosign tool installed, run inside your repo folder:
```bash
COSIGN_PASSWORD="" cosign generate-key-pair
```
The signing key will be used in GitHub Actions and will not work if it is password protected.
> [!WARNING]
> Be careful to *never* accidentally commit `cosign.key` into your git repo. If this key goes out to the public, the security of your repository is compromised.
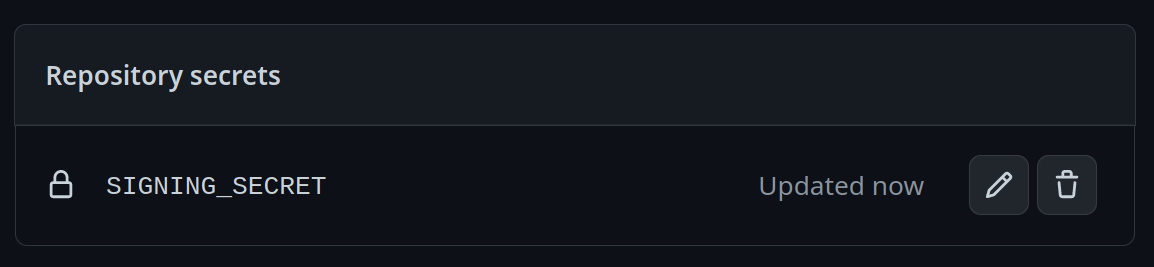
Next, you need to add the key to GitHub. This makes use of GitHub's secret signing system.
Using the Github Web Interface (preferred)
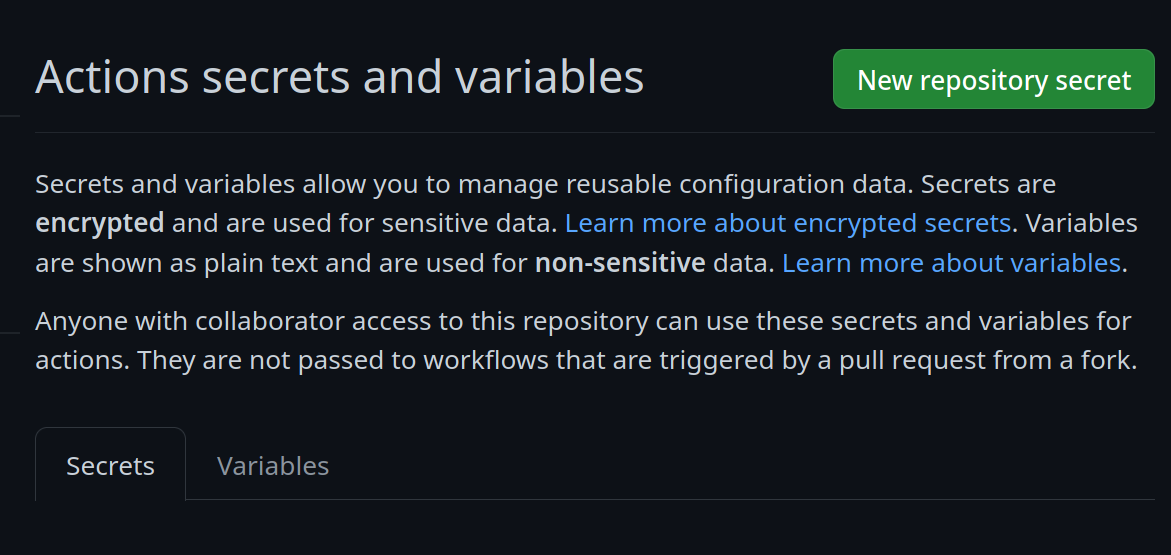
Go to your repository settings, under `Secrets and Variables` -> `Actions`
Add a new secret and name it `SIGNING_SECRET`, then paste the contents of `cosign.key` into the secret and save it. Make sure it's the .key file and not the .pub file. Once done, it should look like this:
Using the Github CLI
If you have the `github-cli` installed, run:
```bash
gh secret set SIGNING_SECRET < cosign.key
```
### Step 2b: Choosing Your Base Image
To choose a base image, simply modify the line in the container file starting with `FROM`. This will be the image your image derives from, and is your starting point for modifications.
For a base image, you can choose any of the Universal Blue images or start from a Fedora Atomic system. Below this paragraph is a dropdown with a non-exhaustive list of potential base images.
Base Images
- Bazzite: `ghcr.io/ublue-os/bazzite:stable`
- Aurora: `ghcr.io/ublue-os/aurora:stable`
- Bluefin: `ghcr.io/ublue-os/bluefin:stable`
- Universal Blue Base: `ghcr.io/ublue-os/base-main:latest`
- Fedora: `quay.io/fedora/fedora-bootc:42`
You can find more Universal Blue images on the [packages page](https://github.com/orgs/ublue-os/packages).
If you don't know which image to pick, choosing the one your system is currently on is the best bet for a smooth transition. To find out what image your system currently uses, run the following command:
```bash
sudo bootc status
```
This will show you all the info you need to know about your current image. The image you are currently on is displayed after `Booted image:`. Paste that information after the `FROM` statement in the Containerfile to set it as your base image.
### Step 2c: Changing Names
Change the first line in the [Justfile](./Justfile) to your image's name.
To commit and push all the files changed and added in step 2 into your Github repository:
```bash
git add Containerfile Justfile cosign.pub
git commit -m "Initial Setup"
git push
```
Once pushed, go look at the Actions tab on your Github repository's page. The green checkmark should be showing on the top commit, which means your new image is ready!
## Step 3: Switch to Your Image
From your bootc system, run the following command substituting in your Github username and image name where noted.
```bash
sudo bootc switch ghcr.io//
```
This should queue your image for the next reboot, which you can do immediately after the command finishes. You have officially set up your custom image! See the following section for an explanation of the important parts of the template for customization.
# Repository Contents
## Containerfile
The [Containerfile](./Containerfile) defines the operations used to customize the selected image.This file is the entrypoint for your image build, and works exactly like a regular podman Containerfile. For reference, please see the [Podman Documentation](https://docs.podman.io/en/latest/Introduction.html).
## build.sh
The [build.sh](./build_files/build.sh) file is called from your Containerfile. It is the best place to install new packages or make any other customization to your system. There are customization examples contained within it for your perusal.
## build.yml
The [build.yml](./.github/workflows/build.yml) Github Actions workflow creates your custom OCI image and publishes it to the Github Container Registry (GHCR). By default, the image name will match the Github repository name. There are several environment variables at the start of the workflow which may be of interest to change.
# Building Disk Images
This template provides an out of the box workflow for creating disk images (ISO, qcow, raw) for your custom OCI image which can be used to directly install onto your machines.
This template provides a way to upload the disk images that is generated from the workflow to a S3 bucket. The disk images will also be available as an artifact from the job, if you wish to use an alternate provider. To upload to S3 we use [rclone](https://rclone.org/) which is able to use [many S3 providers](https://rclone.org/s3/).
## Setting Up ISO Builds
The [build-disk.yml](./.github/workflows/build-disk.yml) Github Actions workflow creates a disk image from your OCI image by utilizing the [bootc-image-builder](https://osbuild.org/docs/bootc/). In order to use this workflow you must complete the following steps:
1. Modify `disk_config/iso.toml` to point to your custom container image before generating an ISO image.
2. If you changed your image name from the default in `build.yml` then in the `build-disk.yml` file edit the `IMAGE_REGISTRY`, `IMAGE_NAME` and `DEFAULT_TAG` environment variables with the correct values. If you did not make changes, skip this step.
3. Finally, if you want to upload your disk images to S3 then you will need to add your S3 configuration to the repository's Action secrets. This can be found by going to your repository settings, under `Secrets and Variables` -> `Actions`. You will need to add the following
- `S3_PROVIDER` - Must match one of the values from the [supported list](https://rclone.org/s3/)
- `S3_BUCKET_NAME` - Your unique bucket name
- `S3_ACCESS_KEY_ID` - It is recommended that you make a separate key just for this workflow
- `S3_SECRET_ACCESS_KEY` - See above.
- `S3_REGION` - The region your bucket lives in. If you do not know then set this value to `auto`.
- `S3_ENDPOINT` - This value will be specific to the bucket as well.
Once the workflow is done, you'll find the disk images either in your S3 bucket or as part of the summary under `Artifacts` after the workflow is completed.
# Artifacthub
This template comes with the necessary tooling to index your image on [artifacthub.io](https://artifacthub.io). Use the `artifacthub-repo.yml` file at the root to verify yourself as the publisher. This is important to you for a few reasons:
- The value of artifacthub is it's one place for people to index their custom images, and since we depend on each other to learn, it helps grow the community.
- You get to see your pet project listed with the other cool projects in Cloud Native.
- Since the site puts your README front and center, it's a good way to learn how to write a good README, learn some marketing, finding your audience, etc.
[Discussion Thread](https://universal-blue.discourse.group/t/listing-your-custom-image-on-artifacthub/6446)
# Justfile Documentation
The `Justfile` contains various commands and configurations for building and managing container images and virtual machine images using Podman and other utilities.
To use it, you must have installed [just](https://just.systems/man/en/introduction.html) from your package manager or manually. It is available by default on all Universal Blue images.
## Environment Variables
- `image_name`: The name of the image (default: "image-template").
- `default_tag`: The default tag for the image (default: "latest").
- `bib_image`: The Bootc Image Builder (BIB) image (default: "quay.io/centos-bootc/bootc-image-builder:latest").
## Building The Image
### `just build`
Builds a container image using Podman.
```bash
just build $target_image $tag
```
Arguments:
- `$target_image`: The tag you want to apply to the image (default: `$image_name`).
- `$tag`: The tag for the image (default: `$default_tag`).
## Building and Running Virtual Machines and ISOs
The below commands all build QCOW2 images. To produce or use a different type of image, substitute in the command with that type in the place of `qcow2`. The available types are `qcow2`, `iso`, and `raw`.
### `just build-qcow2`
Builds a QCOW2 virtual machine image.
```bash
just build-qcow2 $target_image $tag
```
### `just rebuild-qcow2`
Rebuilds a QCOW2 virtual machine image.
```bash
just rebuild-vm $target_image $tag
```
### `just run-vm-qcow2`
Runs a virtual machine from a QCOW2 image.
```bash
just run-vm-qcow2 $target_image $tag
```
### `just spawn-vm`
Runs a virtual machine using systemd-vmspawn.
```bash
just spawn-vm rebuild="0" type="qcow2" ram="6G"
```
## File Management
### `just check`
Checks the syntax of all `.just` files and the `Justfile`.
### `just fix`
Fixes the syntax of all `.just` files and the `Justfile`.
### `just clean`
Cleans the repository by removing build artifacts.
### `just lint`
Runs shell check on all Bash scripts.
### `just format`
Runs shfmt on all Bash scripts.
## Additional resources
For additional driver support, ublue maintains a set of scripts and container images available at [ublue-akmod](https://github.com/ublue-os/akmods). These images include the necessary scripts to install multiple kernel drivers within the container (Nvidia, OpenRazer, Framework...). The documentation provides guidance on how to properly integrate these drivers into your container image.
## Community Examples
These are images derived from this template (or similar enough to this template). Reference them when building your image!
- [m2Giles' OS](https://github.com/m2giles/m2os)
- [bOS](https://github.com/bsherman/bos)
- [Homer](https://github.com/bketelsen/homer/)
- [Amy OS](https://github.com/astrovm/amyos)
- [VeneOS](https://github.com/Venefilyn/veneos)